¶ Introduction
This guide will show how to run jenkins in a docker container. Jenkins will run all build jobs in docker containers as well and will use the same docker daemon as jenkins itself. If you want to know how to spawn build containers in docker swarm or kubernetes this guide is not for you. This is a very basic setup which will run perfectly fine for smaller teams.
¶ Setup Jenkins
This docker-compose.yml will show the minimal configuration. You might want to setup jenkins to run behind traefik with https enabled. Here the image jenkinsci/blueocean is used to get the nice new frontend by default, you can always use jenkinsci/jenkins instead.
version: '3'

services:
  jenkins:
    image: jenkinsci/blueocean:latest
    container_name: jenkins
    user: root
    volumes:
      - "/var/run/docker.sock:/var/run/docker.sock"
      - "./data/jenkins:/var/jenkins_home"
    ports:
      - "8080:8080"
Important is line 9 where the docker socket of the host is made accessible to the jenkins container. This is required for jenkins to be able to start new docker containers on the same docker host.
All the jenkins data is stored to ./data/jenkins, you can change that if desired.
¶ Create Build Container(s)
As described in the introduction every build job will be run in its own build container. As compiling requires software you have to create a docker image with all build tools installed. In my example I want to compile and test a Java/Maven program. That requires a JDK, maven and firefox for frontend tests. Additionally some utility software will be installed.
My example Dockerfile looks like this:
FROM debian

RUN apt update && apt upgrade -y && apt install -y \
    default-jdk \
    maven \
    iceweasel \
    xvfb

ENV DISPLAY=:99
ENV WEBDRIVER_GECKO_DRIVER=/usr/local/bin/geckodriver
ENV JAVA_HOME=/usr/lib/jvm/java-11-openjdk-amd64

COPY start-display /usr/local/bin/start-display
COPY geckodriver /usr/local/bin/geckodriver

RUN mkdir -p /work
WORKDIR /work

CMD ["bash", "-c", "echo 'Java:' ; java --version ; echo ; echo 'Maven:' ; mvn -version ; echo ; echo 'Firefox:' ; firefox --version"]
Now you can build and push you container, I am using a self-hosted docker registry based on Nexus3.
docker build
docker tag <hash> myregistry.example.com/java-build-container
docker push myregistry.example.com/java-build-container
¶ Add Jenkinsfile to Repository
Jenkins will discover all branches on its on, if the contain a Jenkinsfile. This file describes all steps to build and test your source code.
pipeline {
  agent {
    docker {
      image 'myregistry.example.com/java-build-container'
      args '-v /maven:/maven -e JAVA_TOOL_OPTIONS=\'-Duser.home=/maven\' -u root:root'
    }
  }
  stages {
    stage('compile') {
      steps {
        sh 'mvn clean package --fail-at-end -DskipTests'
      }
    }
    stage('test') {
      steps {
        sh 'mvn test --fail-at-end'
      }
    }
    stage('integration-test') {
      steps {
        sh 'xvfb-run mvn verify --fail-at-end -P integration-tests-only'
      }
    }
    stage('deploy') {
      steps {
        sh 'mvn deploy -DskipTests'
      }
    }
  }
  post {
    always {
      junit '**/surefire-reports/**/*.xml'
      archiveArtifacts artifacts: '**/selenium-screenshots/*.png', fingerprint: true, allowEmptyArchive: true
    }
  }
}
The most important part is in line 4. This specifies the docker image where the buil will be executed in. The next line defines additional arguments when jenkins starts the build container. In my case I want to mount my maven settings from the host, this makes sure that my proxy nexus is used when dependencies are resolved. Otherwise the artifacts would be downloaded from the internet.
The build steps are straightforward, a shell command is executed, in my case maven commands like compile, test and deploy. My integration test stage may start a firefox webbrowser for frontend tests, xvfb is used to start firefox headless without a real monitor. In this step screenshots might be taken.
The last step named post can archive artifacts. As the build is running in its own container, everything will be gone if you don't explicitly save it. In my case all test reports and the screenshots from integration tests are saved. Here you could save the resulting artifacts like you executable jar or exe, but as I am deploying those artifacts to my nexus binary storage that is not required.
¶ Configure Jenkins
Jenkins will not magically know your SCM provider nor your credentials. In this step we configure jenkins and create a first simple pipeline.
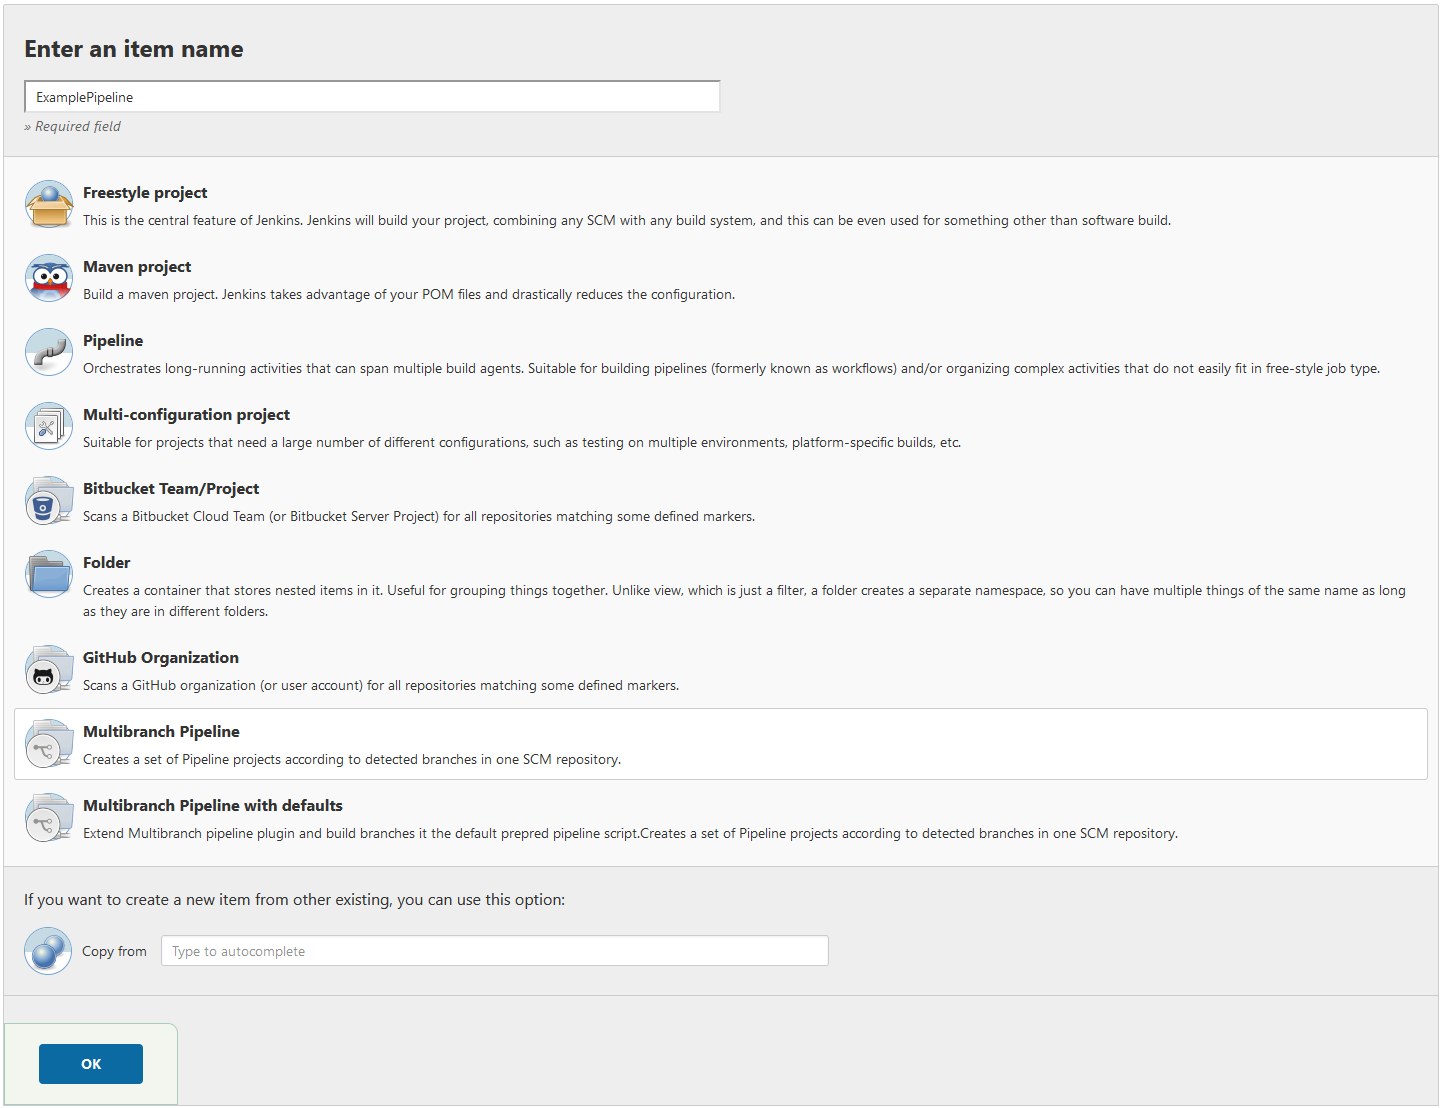
In jenkins click on New Item and select Multibranch Pipeline:
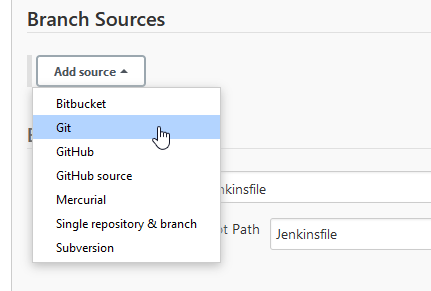
Under branch source select Add source and select a SCM provider. In my case git, but if you have some plugins installed you can e.g. select GitHub if you want to.
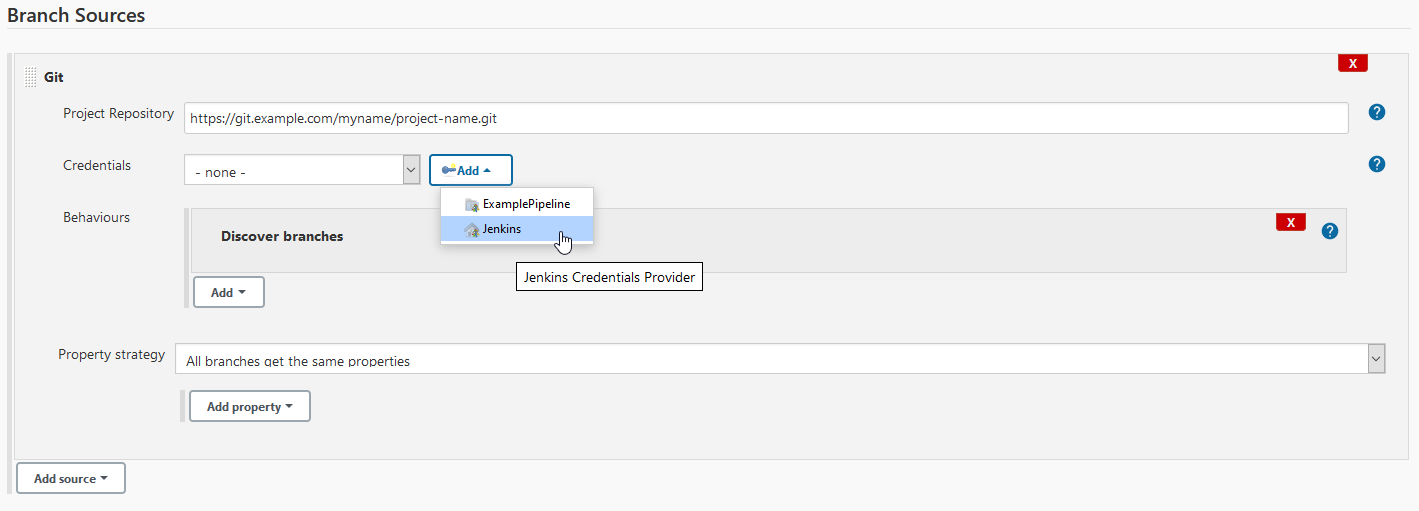
Depending on your SCM provider add the remote URL and add credentials. Und Add select Jenkins so that your credentials can be reused for your next repositories. Leave the behaviours as is, unless you want some specific changes. Here you could add some restrictions, like only discover release branches.
After clicking finish you should see your brand new pipeline. Jenkins will automatically start to discover branches containing your Jenkinsfile. If you dont see any branches, make sure you have a Jenkinsfile in your repository without any typos.

¶ Further Steps
I recommand playing around with jenkins for a couple of hours to find some pitfalls on your own before declaring your jenkins done. It can be a little fiddly at the beginning. Other then that my jenkins is running rock solid ever since.
You should secure your jenkins with https. As jenkins is running in docker already I would recommend taking a look at traefik. A guide will be following.
Most likely you dont want to click through the jenkins UI every time you add a new repository/pipeline. There comes configuration-as-code to the rescue, which definitely deserves a guide.
If you have some projects which require windows to compile, you can add a windows node to Jenkins which is not using docker, obviously. If you label that windows node, you can choose to compile under windows in your Jenkinsfile.
pipeline {
  agent {
    label 'windows'
  }
  ...